Şimdi Ara

BIOS Nasıl Güncellenir ? [ Asus, Gigabyte ve Msi için ayrı ayrı videolu anlatımlar ]

Daha Fazla
Bu Konudaki Kullanıcılar: Daha Az
3 Misafir - 3 Masaüstü
5 sn
44
Cevap
7
Favori
86.380
Tıklama
Daha Fazla
İstatistik
  • Konu İstatistikleri Yükleniyor
4 oy
Öne Çıkar
Sayfa: 123
Sayfaya Git
Git
sonraki
Giriş
Mesaj
  • Forumda çok sık gördüğüm sorunlardan biri de bios update konusundaki bilgisizlikti. Bu konunun herkesin kolayca anlayıp yapabileceği bir kaynak olması için elimden geleni yaptım. Her anakart markasını ayrı inceledim çünkü yöntemleri değişik.

    Öncelikle şunu söyleyeyim. Gigabyte dışındaki anakartlarda, Bios update sırasında elektrikleriniz giderse anakartınız kullanılamaz hale gelecektir. Bu tamamen kendi sorumluluğunuzdadır.

    İlk önce anakartımızın marka ve modelini öğrenelim.

    Bunun için Everest programını kullanacağız. Deneme sürümünü indirmek için tıklayınız

    Programı kurduktan sonra çalıştırıp "bilgisayar" daha sonra "özet" e kısımlarına girerek bilgisayarımızın tüm donanım özelliklerini öğreniyoruz. "Anakart adı" bölümünde çıkan yazı, bizim marka ve modelimizdir. Şimdi markamızı öğrendiysek nasıl yapacağımıza gelelim:


    GIGABYTE

    1) İlk önce gigabyte ın sitesine (www.gigabyte.com.tr ) girip kendi anakartımızı buluyoruz. Sağdan bios butonu ile güncel bios dosyamızı indiriyoruz.

    2) İnen bios dosyaları genelde exe uzantılı sıkıştırılmış dosyalardır. Çift tıklayıp masaüstüne bios dosyasını çıkartalım. Daha sonra bunu usb belleğimize atalım. (disket de olur)

    3) Bilgisayarımız açılırken "delete" tuşuna basıp bios ekranına geliyoruz. Ordan F8 tuşuna basıp Q-Flash sayfasına geçiş yapıyoruz.

    4)
    Çıkan seçeneklerde "update bios from drive" ı seçiyoruz. Karşımıza donanımlar çıkıyor. Bios dosyasını attığımız usb belleğimizi seçiyoruz. Ve dosyaların arasından bios dosyamızı bulup seçiyoruz. Enter tuşuna bastığımızda dosyayı kontrol edecektir.

    5) Dosya doğrulamasından sonra update edip etmeyeceğimizi soruyor. Enter a tıkladığımızda update işlemi başlar.

    6) İşlem bittikten sonra ECS tuşu ile menülerden geriye doğru çıkıyoruz. En son restart yapma sorusu çıkacak. Enter a basıp resetliyoruz.

    Update tamamlanmıştır :)

    videolu anlatım: (ing)


    Gigabyte 'ın Dual Bios özelliği sayesinde bios update sırasında çıkacak hiçbir sorundan korkmanıza gerek yoktur. Eğer update yaparken elektrikleriniz kesilirse bile kendi kendini kurtarabilme özelliğine sahiptir. Canlı örnek:


    ASUS

    1) İlk olarak Asus'un sitesinden (www.asus.com.tr ) arama bölümüne anakartımızın modelini yazarak anakartımızı buluyoruz. Download bölümünden son çıkan bios dosyasını indirip harddiskimizin C: bölümüne atıyoruz.

    2) Bilgisayarımızı kapatıyoruz. Tekrar açıp [DEL] tuşu ile bios ekranına geliyoruz.

    3) Tools sekmesinden "ASUS EZ Flash 2" seçeneğini seçip [ENTER] tuşuna basıp "EZ Flash 2" programını açıyoruz.

    4) Karşımıza uygulamanın çalışmasına yönelik bir doğrulama geliyor ve bunu onaylıyoruz. Ardından uygulama açılıyor.

    5) [TAB] tuşu ile soldaki sürücülerden harddiskimizi seçiyoruz. Sağda çıkan dosyalardan da bios dosyamızı bulup [ENTER] a basıyoruz.

    6) Bizden BIOS dosyasını yazmak için doğrulama isteniyor , YES seçeneğini seçip bunuda [ENTER] tuşu ile geçiyoruz.

    7) BIOS dosyası yazılıyor.. Yazılan BIOS dosyası doğrulanıyor ve bilgisayar yeniden başlıyor. Bu update esnasında bilgisayar kapatılmamalı, restartlanmamalı, elektrikler kesilmemelidir. Aksi takdirde biosunuz zarar görür anakartınız çalışmayabilir.

    Update tamamlanmıştır.

    Videolu anlatım: (ing)


    MSI

    1) İlk önce bir usb bellek yada diskete ihtiyacımız var.

    2) MSI in websitesi olanwww.msi.com.tr adresine girip "download" bölümüne giriyoruz. Çıkan seçeneklerden anakartımızın modelini seçiyoruz.

    3) Anakartımızın özellikleri çıkacak karşımıza. Ordan "BIOS" butonuna tıklıyoruz ve güncel bios dosyasını indiriyoruz.

    4) Önce usb belleğimizi yada disketimizi boot edilebilir hale getirmeliyiz. Nasıl yapılacağını öğrenmek için tıklayınız

    5) İndirdiğimiz bios dosyalarını rar dan çıkarıp boot edilebilir usb bellek yada disketimize atıyoruz. (dosya isimlerini not alın)

    6) Bilgisayarımızı kapatıyoruz. Tekrar açıp biosa girmek için [DEL] e basıyoruz.

    7) Biosa girdikten sonra "advenced bios features" bölümüne ordan "boot sequence" ye giriyoruz ve usb bellek yada disketimizi ilk boot edilecek şekilde ayarlıyoruz. Daha sonra "save & exit setup" a gelip [ENTER] a basıp çıkıyoruz.

    8) Bilgisayarımız tekrar açıkıyor ve taktığımız usb bellek yada disket açıyor. Karşımıza msdos komut ekranı geliyor.

    9) Dos ekranına şu şekilde komut veriyoruz: biosupdate.program.ismi boşluk bios.dosyası.ismi ÖR: afud4310 a7356ims.250

    10) Bios update başlıyor. Bu update esnasında bilgisayar kapatılmamalı, restartlanmamalı, elektrikler kesilmemelidir. Aksi takdirde biosunuz zarar görür anakartınız çalışmayabilir.

    11) Update bitip komut satırı geldiğinde bilgisayarı kapatıp açın. Bir yazı çıkacaktır endişelenmeyin F1 e basıp bios ekranına gelin ve "load optimized defaults" a basın. Daha sonra "save & exit setup" a tıklayıp çıkıyoruz.

    Bios update tamamlanmıştır :)

    videolu anlatım: (ing)


    Not: Anlatımlar ve derleme tamamen bana aittir. Konu sabitlenirse herkesin kolayca faydalanabileceği bir konu olur


    < Bu mesaj bu kişi tarafından değiştirildi caqlayan -- 8 Aralık 2009; 17:40:17 >


  • Yapay Zekanın Yanıtı

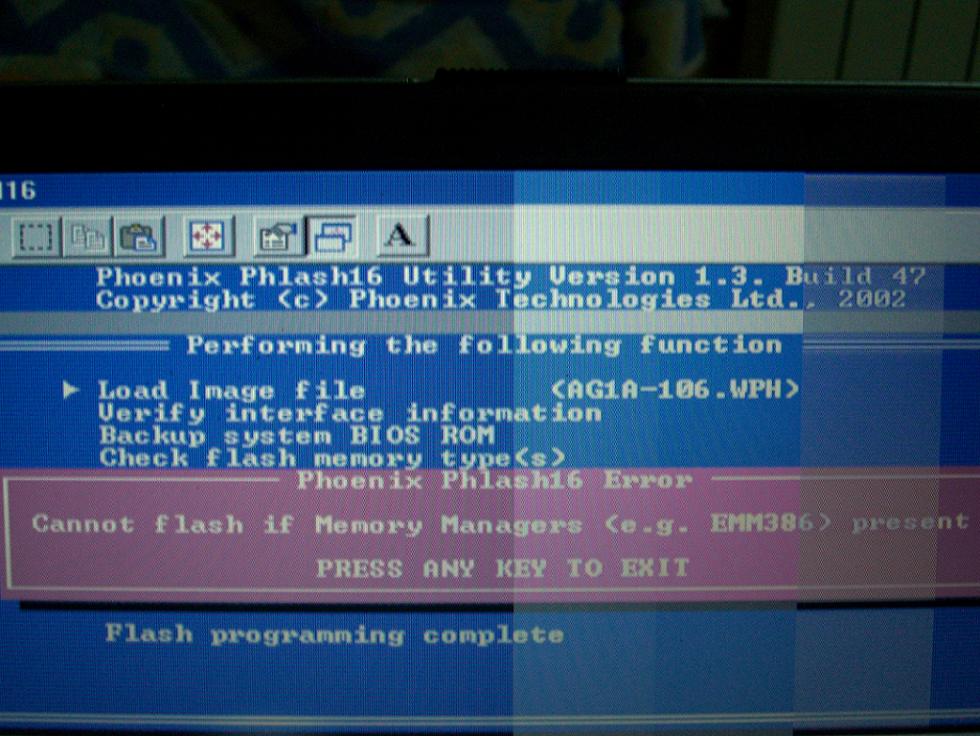
    BIOS Nasıl Güncellenir?

    BIOS (Basic Input/Output System), bilgisayarınızın donanım bileşenlerini yöneten ve işletim sisteminizi yüklemenize olanak tanıyan küçük bir yazılımdır. BIOS'u güncellemek, yeni donanım özellikleri eklemenize, hataları düzeltmenize ve sistem performansını artırmanıza yardımcı olabilir.

    BIOS Güncelleme Adımları:

    BIOS'u güncellemek için aşağıdaki adımları izleyebilirsin:

    1. Anakart modelini belirle: Anakartının modelini öğrenmek için bilgisayarının kullanım kılavuzuna bakabilir veya üçüncü taraf bir araç kullanabilirsin.
    2. Anakart üreticisinin web sitesine git: ASUS, Gigabyte ve MSI gibi anakart üreticilerinin web sitelerini ziyaret et ve anakartının modelini ara.
    3. En son BIOS sürümünü indir: Web sitesinden anakartının modeli için en son BIOS sürümünü indir.
    4. BIOS'u USB sürücüsüne kopyala: İndirilen BIOS dosyasını FAT32 biçimlendirilmiş bir USB sürücüye kopyala.
    5. Bilgisayarını yeniden başlat ve BIOS kurulumuna gir: Bilgisayarını yeniden başlat ve BIOS kurulumuna girmek için üreticinin talimatlarına uy.
    6. BIOS güncelleme seçeneğini bul: BIOS kurulumunda, "BIOS Güncelleme" veya "BIOS Flaş" seçeneğini ara.
    7. USB sürücüsünü seç ve BIOS dosyasını seç: USB sürücüsünü seç ve indirdiğin BIOS dosyasını seç.
    8. Güncelleme işlemini başlat: Güncelleme işlemini başlatmak için ekrandaki yönergeleri izle.
    9. Güncelleme işleminin tamamlanmasını bekle: BIOS güncellemesinin tamamlanması birkaç dakika sürebilir.
    10. Bilgisayarı yeniden başlat: BIOS güncellemesi tamamlandıktan sonra bilgisayarı yeniden başlat.

    Videolu Anlatımlar:

    Daha ayrıntılı talimatlar için aşağıdaki videolu anlatımlara göz atabilirsin:

    • ASUS Ana Kart BIOS Güncelleme Rehberi: [Video bağlantısı]
    • Gigabyte Ana Kart BIOS Güncelleme Rehberi: [Video bağlantısı]
    • MSI Ana Kart BIOS Güncelleme Rehberi: [Video bağlantısı]

    Önemli Notlar:

    • BIOS'u güncellemeden önce bir yedek oluşturmayı unutma.
    • Bilgisayarını BIOS güncelleme işlemi sırasında kapatma.
    • Yanlış BIOS sürümünü kullanmak bilgisayarına zarar verebilir. Anakartının modelinde emin ol.
    Yapay Zekanın Yanıtını Genişlet
  • guzel ısıme yarar
  • Güzel bir paylaşım olmuş emeğine sağlık bi çok kişi için yararlı olacaktır zira forumda biosu bozup konu açanlarıda önler
  • Güzel anlatım olmuş. Teşekkürler
  • çoğu kişinin faydalanabileceği bir anlatım olmuş, teşekkürler
  • Teşekkürler.
    bu konuların bulunduğu bir index hazırlamayı mı düşünüyorsunuz?
    hzırlayacağınız konularda yardımcı olmak isterim.
  • quote:

    Orijinalden alıntı: mrtlln

    Güzel bir paylaşım olmuş emeğine sağlık bi çok kişi için yararlı olacaktır zira forumda biosu bozup konu açanlarıda önler


    Benim de amacım buydu açarken. Bios konusunda çoğu kişi ne yapacağını bilemiyor. Sürekli konu açılıyor bios ile ilgili. Ya da bi problem oluyor biz de diyoruz ki 'bios güncelle' ama kişi nasıl olduğunu bilmiyor. Biz ya anlatmak durumunda kalıyoduk her seferinde yada sorun çözülmeden kalıyordu.

    quote:

    Orijinalden alıntı: Selcuk Igci

    Teşekkürler.
    bu konuların bulunduğu bir index hazırlamayı mı düşünüyorsunuz?
    hzırlayacağınız konularda yardımcı olmak isterim.


    Öyle bi amacım yok şuan için teşekkür ederim. Forumda sık gördüğüm sorunlarla ilgili böyle konular açmayı düşünyorum ama. Siz de bu konuda bireysel olarak foruma katkıda bulunursanız forumdaki insanlar için güzel olur bence


  • Yapay Zeka’dan İlgili Konular
    Asus z97-A Nasıl bir kart?
    11 yıl önce açıldı
    Daha Fazla Göster
  • güzel paylaşım teşekkürler @caqlayan
    emeğine sağlık
    not=bi sihirli el deysede üst konu olsa
  • Öncelikle eline sağlık biosu dos satırından güncellemek için faydalı bir kaynak hazırlamışsın.
    Bir diğer alternatif olarak win altı güncelleme programları önerilebilir dos satırından çok daha konforlu olduğunu düşünüyorum herşey birkaç tık ile sonuçlanıyor sonuç itibariyle.
    Şimdiye dek elimden geçen tüm anakartların bioslarını win altında güncelledim gayet kolay ve konforlu idi.

    Bu seçenekte akıllarda tutulmalı.
  • quote:

    Orijinalden alıntı: activ

    Öncelikle eline sağlık biosu dos satırından güncellemek için faydalı bir kaynak hazırlamışsın.
    Bir diğer alternatif olarak win altı güncelleme programları önerilebilir dos satırından çok daha konforlu olduğunu düşünüyorum herşey birkaç tık ile sonuçlanıyor sonuç itibariyle.
    Şimdiye dek elimden geçen tüm anakartların bioslarını win altında güncelledim gayet kolay ve konforlu idi.

    Bu seçenekte akıllarda tutulmalı.


    Teşekkürler.
    Doğru söylüyorsun yakında o programlarla güncelleme seçeneklerini de konuya ekleyeceğim. Unutulmaması gereken bişey var o tür windows altında update yapan programlar 64bit sistemlerde çalışmıyor. O yüzden böyle yapılması gerekiyor

    @dan-ger yakında olur diye tahmin ediyorum


  • çok güzel bir paylaşım emğe saygı...
    benim de bir sorunum var phoenix 4.06 bir biosum var ve beni 1 ay boyunca şifresini kırmak için uğraştırdı ve en sonunda kırdım bugün ... acer marka laptop kullanıyorum ve şu kırma işlemini yaparken kullandığım yazılımlardan biri sistem konfigürasyonuna zarar verdi ve update ettim ama hala data read eror hatası gitmedi bios menusundeki Advanced BIOS Features Setup menüsü yok bana yardım edebilirmisiniz detayları vereyim...
    Şifre kırmak artık yordu beni ama kesin çözümüde buldum :)
  • emeğine sağlık birçok kişinin işine yarıyabilecek bir konu
  • konu için teşekkürler.hakikaten işe yarar bilgiler,bir çok üyenin en sıkıntılı olduğu bios güncelleme konularını açık ve anlaşılır şekilde izah etmişsiniz.
  • quote:

    Orijinalden alıntı: MeLaN_CHoLY

    çok güzel bir paylaşım emğe saygı...
    benim de bir sorunum var phoenix 4.06 bir biosum var ve beni 1 ay boyunca şifresini kırmak için uğraştırdı ve en sonunda kırdım bugün ... acer marka laptop kullanıyorum ve şu kırma işlemini yaparken kullandığım yazılımlardan biri sistem konfigürasyonuna zarar verdi ve update ettim ama hala data read eror hatası gitmedi bios menusundeki Advanced BIOS Features Setup menüsü yok bana yardım edebilirmisiniz detayları vereyim...
    Şifre kırmak artık yordu beni ama kesin çözümüde buldum :)


    Bios şifresini kırma konusunda pek bilgim yok ama "data read error" hatası alıyorsan bios çipine zarar vermiş olabilirsin yada bios pilinde sorun olabilir

    quote:

    Orijinalden alıntı: pezuk

    emeğine sağlık birçok kişinin işine yarıyabilecek bir konu


    quote:

    Orijinalden alıntı: ada44mavi

    konu için teşekkürler.hakikaten işe yarar bilgiler,bir çok üyenin en sıkıntılı olduğu bios güncelleme konularını açık ve anlaşılır şekilde izah etmişsiniz.


    Ben teşekkür ederim. Umarım bios güncellemekten korkanlar aslında basit olan bu işlemi sorunsuz hallederler


  • Eyvallah kardeşim iyi çalışma olmuş.

    adminlere duyurulur bunu üst konu yapalım.

    gerçi bios güncelleme riskli olduğundan birazda durup düşünmek lazım
  • quote:

    Orijinalden alıntı: caqlayan


    quote:

    Orijinalden alıntı: MeLaN_CHoLY

    çok güzel bir paylaşım emğe saygı...
    benim de bir sorunum var phoenix 4.06 bir biosum var ve beni 1 ay boyunca şifresini kırmak için uğraştırdı ve en sonunda kırdım bugün ... acer marka laptop kullanıyorum ve şu kırma işlemini yaparken kullandığım yazılımlardan biri sistem konfigürasyonuna zarar verdi ve update ettim ama hala data read eror hatası gitmedi bios menusundeki Advanced BIOS Features Setup menüsü yok bana yardım edebilirmisiniz detayları vereyim...
    Şifre kırmak artık yordu beni ama kesin çözümüde buldum :)


    Bios şifresini kırma konusunda pek bilgim yok ama "data read error" hatası alıyorsan bios çipine zarar vermiş olabilirsin yada bios pilinde sorun olabilir

    quote:

    Orijinalden alıntı: pezuk

    emeğine sağlık birçok kişinin işine yarıyabilecek bir konu


    quote:

    Orijinalden alıntı: ada44mavi

    konu için teşekkürler.hakikaten işe yarar bilgiler,bir çok üyenin en sıkıntılı olduğu bios güncelleme konularını açık ve anlaşılır şekilde izah etmişsiniz.


    Ben teşekkür ederim. Umarım bios güncellemekten korkanlar aslında basit olan bu işlemi sorunsuz hallederler


    bios chipi evet biliyorum ama şifreyi kırmadan önce başka bir yazılımlar denerken boottable cdleri gibi... oldu fakat güncelleme ve ya eski bios yazılımına alabilsem yeniden yüklemem gerekiyor bios versiyonumu buldum fakat xp de değilde ms dosta yüklemem lazım ozaman düzeleceğini düşünüyorum...
    acer 2420 bios--
    bios: phoenix 4.06 vers. 1.06 var
    readme içerisindeki ayrıntılar::::
    >>>> [Fixed History]

    --- FXB106WW ---------------------------------------------------------------------
    1.Change KBC PS2 control Mode to Fixed.

    --- FXB105WW ---------------------------------------------------------------------
    1. Change VBIOS to alv12274.aga
    2. Phase in OSB 3.5
    3. Update KBC Common Code
    4. "Fast Boot" in eSettings will not follow BIOS settings.
    5. Invalid keys " "(space), "'" is accepted when set password of Supervisor, and User
    password.

    [SOP]
    Step 1. Unzip <FXB106WW.zip> under Windows mode.

    Step 2. Run <AG1A106.bat> batch file within <FXB106WW> folder under Windows mode to update this bios
    --------------------------------------------------------------------
    içindeki dosya ve klsörler=
    ACERACDC.EXE <<<< bu powerları kontrol ediyor update öncesi..
    AG1A106.bat <<<<< bunu çalıştırınca direk xp de kuruluma geçiyor ( fakat Advanced BIOS Features Setup - bios menüsünde yok)
    PHLASH16.EXE
    AG1A-106.ROM
    FXB106WW.bld
    <1> klasör var .. --->>Alviso
    içerisinde:
    ABVXD.VXD
    AG1A-106.EXE
    AG1A-106.WPH
    flash.sys
    -------------------------------
    zipten bunlar çıktı ayrıca phoenix in bios editör programı ile .rom uzantılı dosyasını açabiliyorum
    bunun içerisinde setup table sekmesinden çeşitli değişikler yapılabiliyor ve setup screen emulation ile slmilasyonunda Advanced BIOS Features Setup seçeneğini koymamışlar
    KISACASI ESKİSİne dönmem için backup yapmaya razıyım


  • sanırım şöyle olması gerekiyor:

    önce bi sistem disketi yada usb belleği oluşturacaksın. (http://www.usbuzmani.com/boot-edilebilir-usb-bellek/ )

    sonra dosyaları içine atığ boot edeceksin ve şu komutu vereceksin

    "A:\>PHLASH16.EXE AG1A-106.ROM /cc /cd /cp /py /sy /cks /R"

    parametrelerin anlamları için:
    http://www.biosflash.com/e/bios-update-howto.htm

    quote:


    Start the Flash program (using Parameter)

    Our Example-Flashprogram named "awdflash.exe" is for an AWARD BIOS. There are many other Flashprograms like: "amiflash", "phlash", pflash", "flash" and they all may have different parameters. To watch these parameters, go to the Commandline (DOS-Prompt) and enter:

    "flashprogramname /? (or /H)".

    Many Mainboard-Manufacturers makes suggestions to start "awdflash.exe" with the following parameter:

    "A:\>awdflash.exe kt7a_kk.bin /cc /cd /cp /py /sy /cks /R"

    Description:
    kt7a_kk.bin = Update filename (example)
    /cc = clear CMOS after Programming
    /cd = clear DMI after Programming
    /cp = clear PNP(ESCD) after Programming
    /py = Program Flash Memory
    /sy = save the old BIOS to: "OLDBIOS.BIN"
    /cks = show Update Binfile Checksum
    /R = Reset System after Programming


    < Bu mesaj bu kişi tarafından değiştirildi caqlayan -- 8 Aralık 2009; 21:34:38 >


  • güzel ve faydalı bir başlık olmuş.. bence içeriği zenginleştirelim ve üst konu talebinde bulunalım..
  • Eline saglık :) üstad süpersin
  • quote:

    Orijinalden alıntı: caqlayan

    sanırım şöyle olması gerekiyor:

    önce bi sistem disketi yada usb belleği oluşturacaksın. (http://www.usbuzmani.com/boot-edilebilir-usb-bellek/ )

    sonra dosyaları içine atığ boot edeceksin ve şu komutu vereceksin

    "A:\>PHLASH16.EXE AG1A-106.ROM /cc /cd /cp /py /sy /cks /R"

    parametrelerin anlamları için:
    http://www.biosflash.com/e/bios-update-howto.htm

    quote:


    Start the Flash program (using Parameter)

    Our Example-Flashprogram named "awdflash.exe" is for an AWARD BIOS. There are many other Flashprograms like: "amiflash", "phlash", pflash", "flash" and they all may have different parameters. To watch these parameters, go to the Commandline (DOS-Prompt) and enter:

    "flashprogramname /? (or /H)".

    Many Mainboard-Manufacturers makes suggestions to start "awdflash.exe" with the following parameter:

    "A:\>awdflash.exe kt7a_kk.bin /cc /cd /cp /py /sy /cks /R"

    Description:
    kt7a_kk.bin = Update filename (example)
    /cc = clear CMOS after Programming
    /cd = clear DMI after Programming
    /cp = clear PNP(ESCD) after Programming
    /py = Program Flash Memory
    /sy = save the old BIOS to: "OLDBIOS.BIN"
    /cks = show Update Binfile Checksum
    /R = Reset System after Programming


    Öncelikle sağolun hocam... Dediklerinizi yaptım hatta bir kaç kombinasyonunuda denedim sonuç resimdeki gibi oluyor

    ... usb den destekli olmadığı için bios ta dvd den ms dos hazırladım 5 dvd ziyan ettim fakat sonuç nafile ... Yabancı sitelerde buluyorum ama çok karışık bilmediğim birsürü adet var dolayısıyla zorlanıyorum mesala elimde biosun kitabçığı var pdf olarak ama anlayamadım şu >>> yazıdada benimkiyle ilgili bilgi vermişler site ismi versemmi vermesemmi bilemedim ama alıntı yapıyorum :
    quote:


    *******How to fix a corrupted Phoenix BIOS using the Crisis Recovery Disk*********
    *****Disclaimer*****
    Everything you read or download here comes 'as is', with absolutely no guarantees. I am not affiliated with Toshiba Corporation, Phoenix Technologies, or any other names mentioned in the text. The Crisis Recovery Disk and Phlash16 tools are copyright Phoenix Technologies. I’m just an end-user like you, who, at one point in time, nearly killed his laptop when a flash update failed. I had a very hard time finding information on how to recover from a corrupted BIOS, but in the end I managed it with something called Phoenix Crisis Recovery Disk. This specially prepared disk can restore a BIOS without any user interaction (black screen, no keyboard) and without taking the laptop apart. In this guide, I will try to give detailed instructions on how to use this otherwise poorly documented method. Most of the information I found came from people who were wrestling with the problem like me, not from official support channels. Hopefully this page will prove helpful to those unfortunate enough to find themselves holding a dead computer after performing a manufacturer supplied BIOS update, as I did.
    ***Bottom line: use at your own risk.
    *****Where to find this document*****
    If you want to bookmark this page, bookmark this forwarding address:http://crd.y1.cc/. The actual location of the page may change, but the forwarder is permanent.
    ******When to use this guide*****
    Use this guide if your system has a Phoenix BIOS which has become corrupted, preventing your machine from booting. The most common causes for a corrupted BIOS are power failure during the flash update, program crash during the flash update, and using the wrong BIOS image file.
    *****When not to use this guide*****
    Do not use this guide in any of the following cases:
    • The BIOS in your system is from a vendor other than Phoenix (e.g. AMIBIOS, legacy AwardBIOS, etc.). This page is for Phoenix BIOS only. Recovery procedures for other vendors may exist, but if they do, I’m not familiar with them. Please don’t ask me about it.
    • Your system cannot boot due to broken hardware (crashed hard drive, busted CPU, etc.). The procedures outlined in this document won’t help you; in fact they can only make matters worse.
    • Your system is under warranty. Call it in at the manufacturer and get an RMA.
    ****The Solution*****
    What follows is a step by step guide to performing the Crisis Recovery procedure.
    *****Step 1: Backup important data*****
    If you’re reading this, you’re probably more worried about losing your computer than losing your data. Still, if there’s anything important on your hard drive, I recommend taking it out and/or making a copy. The hard drive does not need to be connected for the recovery procedure to work.
    *****Step 2: Diagnose the problem*****
    Before you do anything, you want to make sure about two things.
    ****Make sure the BIOS is made by Phoenix*****
    Normally you would look on screen during POST to see the BIOS manufacturer’s name, but since your system doesn’t boot, you’ll have to refer to the motherboard manual or the system manual. You’ll probably find this information within the first few pages, among the other system specs.
    If you don’t have the manual, or it doesn’t contain the name you’re after, you will have to open up the case and take a look at the motherboard. The BIOS chip should have a label with its name attached to it.
    *****Make sure what you’re dealing with really is a corrupt BIOS******
    A corrupted BIOS (sometimes called BIOS checksum failure) can be diagnosed by the following symptoms:
    • When powered on, the power LED lights up, but the screen remains black.
    • Keyboard does not function.
    • Hard drive LED lights up briefly, the disk spins up, but does not boot.
    • Optical drive lights up briefly, but booting from a bootable CD-ROM is not possible.
    • Floppy drive (if present) lights up briefly, but booting from floppy is not possible.
    • Some systems may produce error beep codes indicating BIOS failure. Mine remained silent though.
    • In short, the system does not boot at all. It can be turned off by holding the power button for 3 seconds.
    If all of this applies, you most likely have a corrupted BIOS on your hands. However, you want to make sure it’s not just the CMOS data that has been corrupted. When options in the CMOS are set to incorrect values, the system may become unable to boot with similar symptoms as those described above. The difference is that the settings in the CMOS can be easily reset to fail-safe values using a jumper on the motherboard or a special key combination during POST, where as a corrupted BIOS requires the flashing of new, healthy, BIOS data. If you’re not sure whether it’s the CMOS or the BIOS that is corrupt, then always try to reset the CMOS first. Refer to your motherboard manual for instructions (often called CLEAR CMOS or something similar).
    When you’re convinced it’s the BIOS that’s bad, read on.
    *****Step 3: Verify the boot-block*****
    The Crisis Recovery procedure described in this guide depends on a special emergency feature called the boot-block, which is built into most Phoenix BIOS chips since around 2001. The boot-block is a tiny part of the BIOS that holds some special code. This code allows the computer to boot in Crisis Recovery Mode (CRM), in case the rest of the BIOS becomes corrupted. The boot-block area does not normally get overwritten when a BIOS update (flash) is performed. That said, it is possible to overwrite the boot-block code if you try hard enough, so you want to make sure it is still functional before moving on.
    Procedures to activate the boot-block vary somewhat between manufacturers and models. There are roughly three ways to do it; by special key combination, by motherboard jumper, or by parallel port dongle. You probably won’t know which of these applies to your system, as it’s not something normally documented in the manual. Yet, before you can move on, you have to find the correct method. This is mostly done by trial and error. The process can be a little frustrating.
    First, prepare your system for CRM by removing all media (such as floppy disk, CD-ROM, etc.) and disconnecting all peripherals (mouse, printer, USB devices, etc.). If you have a laptop, remove the battery and disconnect any external monitor and keyboard. If you have a desktop, leave the monitor and keyboard, but remove everything else.
    Running in CRM is like running a dead computer in zombie mode; it’s still dead for the most part, but some basic systems are able to start. In this mode screen, keyboard and hard drive will not function. There will, however, be a few clues that show something special is going on. Here’s what to look for:
    • The CPU fan turns at a higher speed than usual, making more noise.
    • The power LED lights up, possibly in a different color than usual.
    • Caps Lock and Num lock LEDs light up, even though the keyboard itself does not function.
    • The hard drive does not spin up.
    • Other than that, the system will appear to be dead.
    Now that you know how to recognize CRM, proceed to try out the different methods of activating the boot-block.
    ****Trying method 1: Special Key Combination****
    This is the easiest and, thankfully, the most common way to activate the boot-block. From what I read, most laptops today support this method. The procedure is as follows:
    1. Disconnect the power cable.
    2. Press and hold Fn + B.
    3. While holding Fn + B, plug in the power cable. At this point you may notice a brief flash on the screen, which is a good sign.
    4. While still holding Fn + B, press power on.
    5. Release Fn + B.
    6. The system should now boot in Crisis Recovery Mode.
    Some systems may require a different key combination. If Fn + B doesn’t work try: Fn + Esc, WinLogo + B, and WinLogo + Esc. There may be others, but these are the 4 combinations I was able to find. If you can’t find one that works for your system, try method 2.
    *****Trying method 2: Motherboard Jumper****
    *****Trying method 3: Parallel Port Dongle****
    ****Step 4: Getting a floppy drive*****
    *****Step 5: Preparing the disk*****
    Now it’s time to prepare the Crisis Recovery Disk. For this step you will need a working computer with a floppy drive (can be the same floppy drive as the one you use on the target system, although it’s easier if both systems have their own drive).
    Download the Phoenix Crisis Recovery Disk Creation Package: zipped, self-extracting
    Extract the package to an empty folder. I will refer to this folder as the CRDC folder.
    Download the latest production BIOS for your system. Get it from the manufacturer’s website. Warning: Crisis Recovery will flash whatever you feed it. Normal checks to see if image matches board are skipped, so make 100% sure you have the correct file for your system. Once downloaded, locate the BIOS binary file, rename it to BIOS.WPH and move it to the CRDC folder.
    There are two ways of creating a Crisis Recovery Disk: under Windows or under native MS-DOS. I have tried both ways, but only the disks created under native MS-DOS worked, so I will ignore the Windows based method. If you must try, run WINCRIS.EXE under Windows, and choose MINIDOS Crisis Disk.
    Next you have to prepare your working machine to boot into native MS-DOS. This is not as trivial as it used to be 10 years ago. Here’s how I did it. First, I created a small (10 MB) temporary partition on my hard drive and formatted it with FAT. Next, I copied the CRDC folder to this partition. Then, I looked up an old Windows 98 CD-ROM and used it to boot a native MS-DOS environment directly from the CD (choose Boot from CD-ROM and Safe Command Prompt – Shift F5). If you don’t have a Windows 98 CD-ROM handy, you can use a bootable floppy disk instead: compressed image, self-writing image. There are, of course, other ways to boot a native MS-DOS environment. Any of them will work fine as long you are not in a Windows DOS box/command prompt.
    Once you are in a native MS-DOS environment, navigate to your temporary partition and run:
    C:\CRDC>CRISDISK B:
    Note: I use B: because by booting from a Windows 98 CD-ROM drive A: becomes a virtual drive, and the real floppy drive becomes B:.
    CRISDISK will perform the following actions: format a floppy, copy the needed files to it (MINIDOS.SYS, PHLASH16.EXE, BIOS.WPH), and install a customized boot sector. Note that the order of these actions is important. If the files do not end up in a specific directory entry on the disk it will not work. MINIDOS.SYS must occupy the first directory entry, etc. Yes, I know it sounds weird, but trust me on this.
    Once the disk is created, take it out. You are now ready for the final step.
    *******Step 6: Using the disk******
    While the target system is fully powered off, hook up the floppy drive and put in the Crisis Recovery Disk (CRD). Now boot the system into Recovery Mode (as established in Step 3). If all went well, the system will start reading the disk (a very good sign!). This takes about 2 minutes for a typical 1 MB BIOS file. After the reading is done, the flashing procedure should begin automatically. There may be beeps during flashing, or the system may remain silent as mine did. Since the screen is still black, there is nothing to indicate something is going on. Just give it at good 5 minutes, and then flashing should be done. After that, the system may or may not automatically power down. If nothing happens after 5 minutes, power it down by pulling the plug. Then try a normal boot to see if it worked (remember to remove jumper or dongle if you had to use one to activate the boot-block). If the system boots, congratulations, you saved your machine! If not, read on.
    For me it didn’t work the first time, or the second time, or the third. In fact, I have lost count of how many times I tried before it finally worked. The version of PHLASH16.EXE that gets put on the CRD by default is one of the newest around, and is reported to work on many systems, however for me it didn’t work. I had to try out many other versions of PHLASH16.EXE before I found one that did the trick. So for people who encounter similar difficulties, I have included all different versions I managed to find. They are:
    • PHLASH1A.EXE (v1.3.4.7)
    • PHLASH1B.EXE (v1.3.5.1)
    • PHLASH1C.EXE (v1.4.5.7)
    • PHLASH1D.EXE (v1.4.5.9a)
    • PHLASH1E.EXE (v1.6.0.2)
    • PHLASH1F.EXE (v1.6.1.9)
    • PHLASH1G.EXE (v1.6.4.2)
    • PHLASH1H.EXE (v1.6.5.4)
    • PHLASH1I.EXE (v1.6.7.0)
    So, what to do if everything works up to the reading of the disk, you wait 5 minutes, yet the system remains dead? Put the floppy back in the working system, and create a new Recovery Disk with a different version of PHLASH16.EXE on it, by running:
    C:\CRDC>COPY /Y PHLASH1A.EXE PHLASH16.EXE
    C:\CRDC>CRISDISK B:
    Remember, simply copying a different version on PHLASH16.EXE over the existing one on the floppy won’t work. It will screw up the directory entries. Silly, I know, but that’s how this system was designed. Run the full CRISDISK script instead, as shown in the command above.
    If PHLASH1A.EXE doesn’t work either, try PHLASH1B.EXE and work your work down the list until you find one that works. For me it was PHLASH1B.EXE (v1.3.5.1) that did it.
    If none of the included versions work, you could try the whole process from the beginning but with a different (older or newer) BIOS.WPH file for your system. Remember, if you can get the system to boot in Recovery Mode and read the floppy, you’re almost there. Keep trying. Follow my instructions to the letter. It can get tedious and time consuming, I know; I was almost ready to give up after three days of fruitless attempts, but when I finally found the right combination of files, it was all worth it.

    TEK DERDİM ŞU BİOS un tam menu gözükebilmesi çünkü şuan wlan kartınıda algılayamıyor ve data read eror hatası veriyor ya güncelleme yada geri yükleme önce yazımdada belirttim elimde bulunan dosyayı ayrıca bu alıntıdaki Crisis Recovery klasörüde var yani yokmu bu işin içinden çıkmanın yolu 90 lira bios şifreni kırdırmaya ödemedik 1 aydır kendim uğraştım kırdım ama bu configuration ayarları beni ayar etti .... TEŞEKKÜRLER tüm derdimi sonuna kadar okumaya gayret edenlere ve yardım edenlere...


    < Bu mesaj bu kişi tarafından değiştirildi MeLaN_CHoLY -- 10 Aralık 2009; 2:39:15 >


  • 
Sayfa: 123
Sayfaya Git
Git
sonraki
- x
Bildirim
mesajınız kopyalandı (ctrl+v) yapıştırmak istediğiniz yere yapıştırabilirsiniz.